Monday, February 17, 2014

Macaroni and Cheeze (vegan)

When I read on VegNews that this is "the best mac 'n' cheese on the planet," I just had to give it a try.  I liked that it was vegan for a couple of reasons, the obvious one being that I like making cruelty-free and delicious food, and the other being that my mother, who is Asian, passed on not just her dark hair and brown eyes to me, but also her inability to efficiently digest milk sugars.  I don't particularly even like traditional macaroni and cheese.  I didn't eat it much as a child, and when I did, it made me sick.  But it is the ultimate in comfort food, and I just couldn't resist testing out a claim of a dish of mac & cheese that was the best on the planet.

Here is what you will need.  This is not the measured out product, just the overview of what you'll be operating with.


The cheese (or "cheeze" as a vegan friend of mine likes to call it) is made with cashews.  If you are allergic to nuts, I have been told that raw sunflower seeds can be substituted, but I haven't tried it yet, so would love to hear back on that.

I have made some very minor tweaks.  If you want the original recipe, you can check out the link.

The ingredient list:

4 quarts of water
1 T. salt
1/2 of a 16 oz package of dry macaroni

4 slices of bread, torn into large pieces
2 T. vegan margarine (non-hydrogenated)

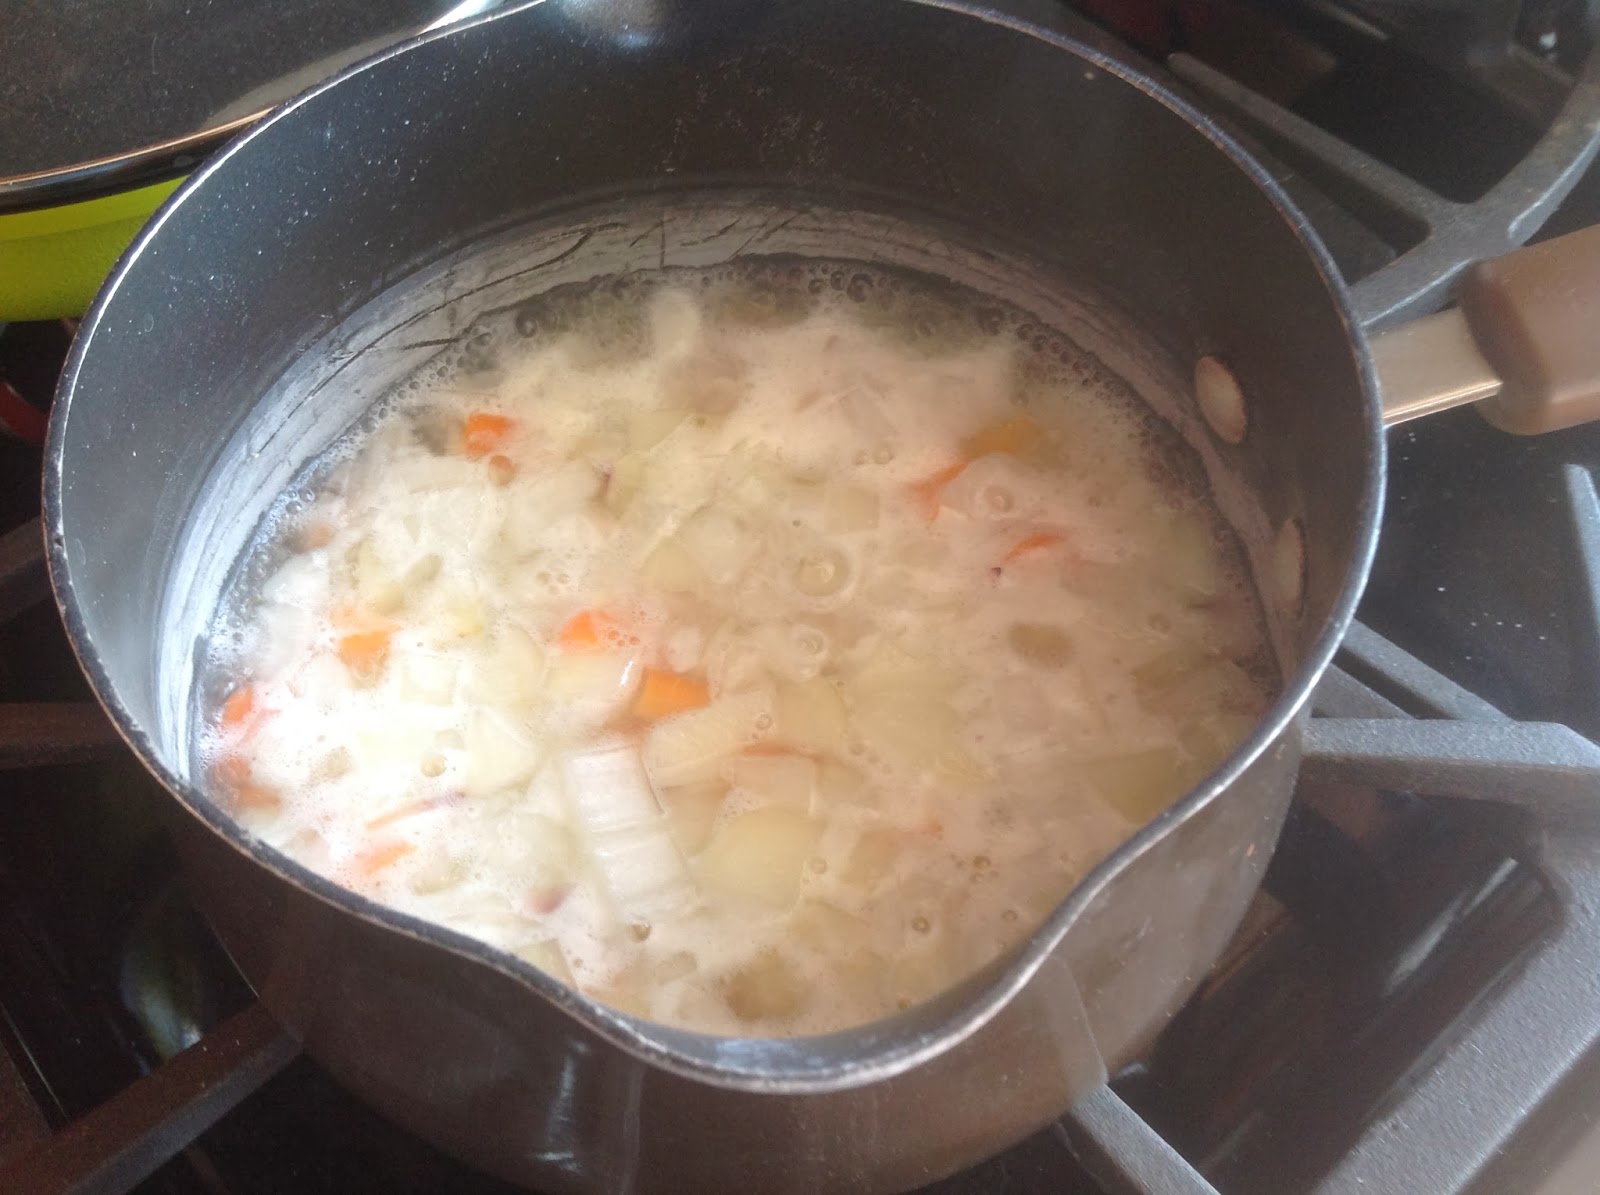
2 T. shallots, peeled and chopped
1 c. yellow or red potatoes (I used yellow), peeled and chopped
1/4 c. carrots, peeled and chopped
1/3 c. onion, peeled and chopped
1 c. water

1/4 c. raw cashews
1/3 c. vegan margarine
2 t. salt
1/4 t. garlic, minced
1/4 t. Dijon mustard
1 T. lemon juice
1/4 t. black pepper
1/8 t. cayenne
1/4 t. paprika

In a large pot, boil water with salt.  Add macaroni and cook until al dente (approx 6 minutes).  Drain pasta and rinse well with cold water.  Set aside.

In a food processor, make breadcrumbs by pulverizing the bread and 2 T. margarine until med-fine texture.  Set aside.

In a saucepan, add shallots, potatoes, carrots, onion, and water, and bring to a boil.  Reduce to a simmer, cover pan, and cook for 15 minutes or until veggies are very soft.


In a blender, blend cashews, garlic, margarine, salt, mustard, lemon juice, pepper, cayenne, and paprika.  Add softened veggies and cooking water to blender and blend until smooth.  (I use a Vitamix, so not sure if a regular blender will get you there, but the recipe does not call for a high-speed blender.)

From left to right, you have your final mixtures:  buttery breadcrumbs, cheeze sauce, and cooked pasta.

In a large bowl, toss pasta and blended cheeze sauce until completely coated.

Spread mixture into a 9x12 casserole dish, then sprinkle with prepared breadcrumbs.


Bake for 30-35 minutes or until sauce is bubbling and top is golden brown.

While you are waiting for your finished product, you will find that you have just enough time to:

Clean your workspace, including all your prep materials.

Rinse the seeds you started soaking last night to make sprout mix for the chickens and parrots.
Rinse off the onion goggles.
Hand-squeeze yourself a nice fresh glass of grapefruit juice (with a twist of lemon from the leftover half of lemon from this recipe).
Use that fresh glass of juice to take a probiotic.
Feed your dogs their breakfast.
Make yourself a nice hot cup of whatever you like nice and hot and in a cup.

I let my mac & cheeze go for 35 minutes, because I wanted more bubbly action from the sauce.

This is hot out of the oven.

And the moment of truth....

It is pretty darned good!  :)

I wasn't sure about the breadcrumbs, initially, but they add a really nice crunchy texture to the blend.  The cheeze sauce is creamy and delicious, and the macaroni is just the right consistency.

It is definitely an "adult" macaroni and cheese; however, in that the tastes are a little more sophisticated that one would find in a cardboard box manufactured by Kraft.  The cayenne gives it a tiny bit of a kick.  It isn't super strong, but if you don't want ANY spiciness, or if you are feeding it to kids who haven't really developed a sophisticated palate, I would knock the cayenne back to about half the stated measurement.  Other than that, the meal delivers on that comfort food level of creamy and warm and just a little bit decadent.   And if no one told you, you would never know that this is cow juice free.

Depending on how well it stores, I would definitely consider making this again.   (A 9x12 pan of mac & cheeze is a LOT of cheezy goodness for one person to eat, even without the milk sugars!  I am hoping it freezes well!)

My super-picky carnivorous housemates also thought it was pretty darned tasty, btw, and they cleaned the plate!

Wednesday, February 5, 2014

Cold Sesame Noodles

I know my last post was also about noodles, but I promise that you will want to give these a try, as well!

I wish I could give credit where credit is due, but I have this recipe on a typed piece of paper, with no reference to the author, so I can only say that it is not an original creation by me, although I did tweak it a bit to accommodate both my tastes and my ingredient list.

 Here is what you'll need:

1 pkg Chinese egg noodles (10 oz)(aka Lo Mein)
2 T. peanut oil
2 t. minced garlic
2 t. grated ginger
1 cucumber, peeled and julienned
2 carrots, peeled and julienned
2 t. sesame seeds (plain or toasted)
2 scallions, green part only, thinly sliced

3 T. sesame paste (or 3 T. tahini and 1 t. sesame oil)
2 T. peanut butter
2 T. soy sauce
1 T. sesame oil
2 T. rice vinegar
2 t. chili paste
2 T. sugar

Bring a large pot of water to boil and cook egg noodles until al dente, or the minimum amount of time according to package instructions.  Drain immediately, rinse well with cold water, drain again.  Toss with 1 T. peanut oil and set aside.

Heat 1 T. peanut oil in a medium sauce pan over medium heat.  Gently cook the garlic and ginger until fragrant, approximately 30-40 seconds.  Remove from heat and set aside.

Place carrots in same sauce pan and saute carrots just until softened, 1-2 minutes.  Remove from heat and set aside.

Place scallions in same sauce pan and saute just until softened, 30-40 seconds.  Remove from heat and set aside.

Prepare the sauce by combining sesame paste, peanut butter, soy sauce, sesame oil, rice vinegar, chili paste, and sugar.  Add 3 T. water.  Whisk until smooth.  Stir in cooked garlic and ginger.

Put noodles in large container, then add sauce, cucumbers, and carrots.  Mix well.

Cover and place in fridge until cool, 1-2 hours.

Serve in smaller bowls or dishes, sprinkling sesame seeds and a pinch of scallion on top.

Serves 4-6 and keeps well in fridge for several days.

The original recipe did not call for cooking the carrots or scallions, but I don't like the texture or taste of raw carrots and scallions in salad, so I opted to cook them lightly.

The original recipe called for smooth peanut butter, or what I call a waste of good peanut butter.  It's chunky or go home in this house.  I used super chunk, and it turned out just fine.


Monday, January 13, 2014

Soba Noodle Salad


Another super easy dish for you.  It requires that you have enough culinary skill to boil water and chop veggies, and that is about it.

You can also make it up the day before, to give the flavours a chance to blend.

The recipe says you can use spaghetti noodles in place of soba noodles, but soba noodles are readily available at most grocery stores (check out the Asian aisle, people) and add something to the dish.  I am not saying don't make it with spaghetti noodles:  it will just be a different dish.

The recipe (6 servings):

1 lb dried soba noodles
1/4 c. sesame oil
1/4 c. soy sauce
2 T. sugar
1 1/2 T. balsamic vinegar (again, as I've mentioned before, quality counts)
2 t. salt
1 c. chopped fresh cilantro
8 green onions, thinly sliced
2 T. red or green jalapeno chilies, seeded, veins removed, minced
1 1/2 c. lightly salted dry-roasted peanuts, coarsely chopped (optional as garnish)

Cook the noodles in a large pot of rapidly boiled salted water until just tender but still firm to bit, stirring occasionally.  Drain and rinse with cold water to stop them from cooking further.  Drain well.  Transfer to a large bowl.
Combine sesame oil, soy sauce, sugar, vinegar, and salt.   Stir to dissolve sugar.  Add to noodles.
(You may find, as I did, that you don't need all the sauce.  I had enough to reserve for a second batch of noodles.)

Add cilantro, green onions, and chilies to noodles and mix well.  (I was not able to find fresh cilantro, so had to use this goop-in-a-tube.  It worked, but looked disgusting when I squirted it into a cup to make sure I had enough.)  (Note to self:  plant cilantro this spring!)  I would probably also use red chilies next time, just to add colour.
Mix well.  Sprinkle with peanuts, if desired, or you can sprinkle the peanuts on after serving, or skip the whole peanut thing altogether.
And that is all there is to it!  As you can see, I decided to serve it as a side dish to that salmon I made over the weekend.

The only thing I don't like about this salad is that the little chopped bits have a tendency to settle at the bottom of the plate, so at the end, you have a little pile of scallions and chilies (and peanuts) sitting there.  I might try slicing the vegetables into 2-3" long pieces, then slicing vertically next time, so they stay with the noodles when lifted off the plate.

Some people shy away from jalapenos, but I didn't find them to be hot at all, maybe because I used the green ones.  If you just don't like spicy at all, a red bell pepper would not change the dish much and would be an acceptable substitute.

If, on the other hand, like me, you like your food spicy, these chilies didn't do much.  I am thinking a little dash of chili oil might be in the future for this salad.


Sunday, January 12, 2014

Salmon with Teriyaki Glaze

Another "blast from the past," this recipe is from the January 1994 edition of Bon Appétit.   I will say right off that I would not make the vegetables again.  The salmon was delicious, but the vegetables tasted like an American's idea of what Asian vegetables should taste like.  I would either skip the vegetables and go with a nice green salad, or use the veggies of your choice.  

This was VERY SIMPLE and EASY.  With prep, it took me just a little over half an hour to go from a bunch of raw ingredients to a fully-prepared meal.  The only thing you want to be careful about is not over-cooking the salmon, and since you are pulling it out every two minutes to re-glaze it, that is something that is easy to monitor.  I bought my salmon as one solid piece, so it took a little over 8 minutes, but at 8, I flaked it back a bit and took a peek to see how it was coming.  If you are cooking for guests, you can hide that peek with a little glaze.  :)

Here (basically) is the recipe.

Glaze for salmon:

1 c. sake
3/4 c. soy sauce
1/4 c. sugar
5 quarter-sized slices fresh ginger (use FRESH ginger, not that crap in a jar!!)
2 lemon grass stalks, sliced

Vegetable "medley":

2 T. vegetable oil
4 quarter-sized slices fresh ginger, peeled and minced
2 lbs bok choy, cut into 3/4-inch thick slices, white and green parts separated
15 oz. baby corn, drained and halved lengthwise
salt (to season)
1/2 c. thinly sliced fresh basil

6 six ounce salmon fillets  (If you can afford it, get wild-caught.  You won't regret it.)

Combine glaze ingredients in a heavy small saucepan and bring to a simmer, stirring to dissolve the sugar.  Simmer approximately 10 minutes.   Strain.  Discard solids.
Preheat broiler.  Arrange salmon, skin side down, on the broiler pan.  Brush salmon generously with glaze, reserving approximately 3 T. of glaze for the veggies.  Broil without turning until cooked through, approximately 8 minutes, brushing with glaze every 2 minutes.

If you are good at multi-tasking, when you put your salmon in, you can also heat 2 T. of oil in a large heavy skillet (or wok).  Add the minced ginger and cook on high for about 30 seconds.  Add the white part of the bok choy and stir-fry for about 3 minutes, or until the stalks begin to soften.  Add green part of the bok choy, baby corn, and a sprinkle of salt.  Stir fry until bok choy is wilted and corn is heated through, about 2 minutes.  (I found it helped to have all the ingredients lined up and ready to go.)  Add sliced fresh basil and 3 T. glaze and stir to coat. 

Serve!  (I screwed up.   This would have looked a lot better if I had not cut the fillet. ) BTW, this is only about a 3/4 lb fillet, so if you are cooking for one, you can get a really nice cut of wild-caught salmon for less than $6-7.

Again, I'd replace the bok choy/baby corn combo with whatever vegetables you typically like in a stir-fry, or make it easy on yourself and serve with a salad.  It was a lot of work to go through to get a bland side to an otherwise fantastic dinner.

Monday, January 6, 2014

Grilled Veggie Wrap


I have this habit of saving recipes that I will probably never try.  I have a grocery bag full of them, and I occasionally go through the bag and weed out the ones that sounded good when I clipped them but now no longer appeal to me.  And as I go through this recipe purge, I usually find one or two that re-pique my interest.  Thus was the situation this last week, when I stumbled upon a 1995 recipe out of Bon Appétit for a "Grilled Vegetable Sandwich".  

Recipe in hand, I diligently made out my shopping list and just as diligently went out and procured the necessary ingredients, as I don't typically have a fresh supply of shitake mushrooms, ciabatta bread, and eggplant laying about the house.

I was, shall we say, less than impressed.  However, here I was with all this eggplant and a bag full of mushrooms (although, due to a dearth of shitake at the grocery store, I had settled on baby portabella).  I decided to tweak the recipe a bit and try it again, and this is what I came up with.

1 bulb of garlic (optional)
3-5 T. olive oil
1 red or yellow bell pepper
1 eggplant (bell or Asian okay)
1 zucchini
1/2 c. mushrooms (your choice)
1/2 c. sliced onions
1/2 t. thyme
2-3 leaves of fresh basil
1 fresh tomato
1 T. balsamic vinegar
salt and pepper
whole wheat tortillas
butter


I note that the garlic is optional, but really, everything on here is optional.  If you hate onions, for example, leave them out, or replace them with some vegetable you love.  If you love mushroom, add more.  The reason why I say optional for the garlic is because it is a whole additional step that is not critical to the success of the wrap.  But let's go on....

Preheat your oven to 400F.


Place the garlic (or if you want to have some roasted garlic on hand for other occasions, place several bulbs of garlic) into a baking sheet.  Sprinkle with approx 1 T. olive oil, then bake for 40 minutes to an hour, or until garlic is soft.  (If you like the result, I highly recommend getting a clay garlic roaster.  I have one and use it often.)  Remove bulb and set aside.

Increase oven temp to broil.

Cut red bell pepper in half vertically and remove seeds.  Place bell pepper, cut side down on the baking sheet.  Place under broiler and broil until skin is charred, approximately 10 minutes.  Put pepper in a paper bag and set aside for about another ten minutes, or until cool enough to handle.  Remove skin from pepper and cut flesh into strips.

Slice eggplant and zucchini into strips and place on baking sheet with onion and mushroom.  (Or, if you are like me and realize that all your baking sheets were in the bottom drawer of the oven you had hauled away, improvise and use aluminum foil).  Drizzle with 1 T. olive oil.  Season both sides with salt, pepper, thyme.


Stick that under your broiler for about 12-15 minutes, turning once, until nicely cooked.

(You may notice that this particular photo above shows scallions, not onions.  This was from the original recipe, and I found the taste of scallions didn't do much to improve the sandwich.  I made my second batch with sliced white onion, so you may see pictures in which the onions and scallions magically interchange, depending on when I took the photograph.)

Combine 1 T. balsamic vinegar with 1 T. olive oil and set aside.

Take one or two cloves of roasted garlic and smash them onto the whole wheat tortilla.  Add a little butter, if you'd like.  I thought it added a nice creamy texture to the wrap, but it was not in the original recipe.  If you want to keep it vegan, omit the butter.  (On the flip side, if you are a confirmed carnivore, this mix would be fantastic with grilled beef!)

The original recipe calls for then layering your basil, fresh tomato, and roasted veggies (including bell pepper) on the bread (now tortilla), then drizzling with the balsamic vinegar/olive oil, so I tried it that way at first.  Pro:  the veggies pretty much stay put and don't fall out of the wrap.  Con:  you don't necessarily get a homogenous mix of tastes unless you are very strategic with your veggie arrangement.  As you can see in the pic, there would be sections of this wrap that would include twice as much zucchini as other sections.

Which is why I decided to do this:  after roasting, I chopped all the veggies, the fresh tomato, and the basil up into roughly similarly sized chunks, and drizzled the balsamic vinegar/olive oil into the blend.  I preferred it this way,  not only to address the taste, but because I had veggies left over, so it made it very easy to just put that mix in a container and use it again, vs. having to pick out and arrange strips, cut up more fresh veggies, and drizzle.  This way, I can quickly just scoop the mix out onto the tortilla and be on my way.

As you can see, it makes for a more homogenized blend, although the veggies have more of a tendency to fall out when you pick the wrap up.  I had a LOT of veggies left over, btw, probably enough to make several more sandwiches, so keep that in mind and adjust your measurements accordingly.  I suspect this mix will last just a few days in the fridge and probably doesn't freeze well.   I may try freezing some just to find out, but I think it will turn the fresh tomato into mush.  Next time, I might reserve the fresh tomatoes and slice them on at the end.

So, there you have it.  Pretty easy, pretty healthy, and pretty tasty.  And that, dare I say it, is a wrap. 


Wednesday, January 1, 2014

In Search of the Perfect Green Salad

New year, and in the spirit of resolutions to eat healthier, lose weight, etc, etc, I decided to post about a simple dish:  the ubiquitous green salad.

Yawn, right?  Wrong!!  The right green salad can be a taste explosion in your mouth!  It can grab those taste buds by the base and slap them around a little, and you can find yourself sitting up taller and feeling proud of yourself for not having a hamburger for lunch!

Every good painting starts with a good canvas.  That said, iceburg lettuce should be outlawed.  It shouldn't even be called lettuce.  It is crunchy, watery, non-food.   Slugs couldn't live on it, so why should you?   Happily, there are much better options available, and most of them are pre-cut, pre-washed, and pretty much everything but pre-digested for you, so go for it.  (If you are a hard core pioneer type, they are also available in their natural state, so feel free to grab a few heads and get to chopping.)

As for me, I like a combination that I can't find in the stores, so I make my own.  It consists of a ratio of approximately two parts spring mix, one part baby spinach, and one part butter leaf lettuce.  These can all be found in the afore-mentioned prepared condition.  If my salad lettuce were a painting of a seascape, the spring mix would be the ocean; the spinach would be the tree line, and the butter leaf would be the light fluffy clouds hovering over the water.  That may not be the right mix for you, however.  Maybe you prefer portraits.  The point is, make the base your own.  Pick lettuces (or spinach or kale or whatever) that sings to you and experiment.

Now that you have your base, let the fun begin!!  Add-on's to your green salad can include pretty much anything, with the exception of ground beef (in which case, you have transformed your green salad into a taco salad); ham, turkey, or chicken breast (Cobb salad); or tuna (Salad Nicoise).  (Hey, I don't make the rules.)   Let's assume, for the sake of simplicity, that you want to keep your salad vegetarian and green.  Here are a few suggestions for add-on's:

Stuff that you can keep in your pantry FOREVER:
croutons (whatever seasoning makes you crazy)
dried cranberries or raisins
fried onions (or fresh red onions, if you are single or hate your significant other)
slivered almonds (again, about a dozen kinds in the salad section at the supermarket)
chopped walnuts (or candied walnuts, pecans, etc.)sunflower seeds (shelled)
pumpkin seeds (shelled)

Stuff that you can keep in your pantry/freezer almost FOREVER:
garbanzo beans (canned or cooked)
kidney beans (canned or cooked)
peas (shelled or from a bag)
*shredded cheese (Cheddar, Parmesan, etc)
*crumbled cheese (Bleu, Feta, etc)
crushed pineapple
canned Mandarin oranges (or fresh)

Stuff you probably want to buy within a few days of use:
hard-boiled egg (although, seriously, I keep eggs in the fridge a LONG time)
tomatoes (personally, I go for cherry tomatoes)
avocado
fresh sliced mushrooms
sliced cucumber
shredded carrots
sprouts (alfalfa, clover, etc.)
fresh herbs or edible flowers (if you want to get all artsy on your salad)

And now we get to the part that makes or breaks your salad:  the dressing.

You have a couple of options when it comes to dressing.  If you are not watching calories, your field is wide open.  You can slather on the Thousand Island or Ranch and eat with gusto.   Marie's makes a wonderful (although not calorie-friendly) honey mustard dressing, as well as several other tasty options.


If you are having a salad because you thought you might want to cut back a bit on the fat and calories, you still have a lot of good options.  My absolute favourite dressing is balsamic vinaigrette, which is super easy to make, relatively low-calorie, and delicious.  Just make sure you use GOOD balsamic vinegar and GOOD olive oil, or you will taste the difference, and it will not make you happy.  My recipe is:

In a glass jar (approx 16 oz) with lid, combine:

1/4 c. balsamic vinegar (I use Modena)
2 t. dark brown sugar
1 T. chopped garlic
1/2 t. salt
1/2 t. ground black pepper
3/4 c. olive oil (I use California Olive Ranch)

Put the lid on and shake to combine.  Taste.  If you want it a little sweeter, add a bit more sugar.  If you want it a little more tart, add a bit more vinegar.  Put the lid on.  Shake. Taste.  Repeat until perfect.

Another good option is a brand called Litehouse.  I recently tried their Fuji Apple (yeah, I went there) vinaigrette, and even my meat-and-potatoes loving family went crazy over it.   Litehouse has yet to disappoint me, btw, and they have a LOT of different dressings.  Here is a listing of them.  Makes me want to eat more salad!


*BTW, if you think you know your cheeses, check out this link!!

And there you have it:  the green salad.  If you like any particular toppings that I didn't list here, please feel free to add them to the comments section.  I am always looking to try new things.  :)